It seems like it has been forever since I have posted on here, with summer in full swing we have been busy outside. I posted about a month ago about how my son was on the verge of losing his first tooth, so I made him this Tooth Fairy Pillow. I am happy to report that the Tooth Fairy did come to our house on May 30th and he now has another loose tooth and is excited because he can’t wait to see how much money the Tooth Fairy brings. I think he might be a little disappointed when he does not get as much for his second tooth as his first, the Tooth Fairy would go broke giving him the first tooth premium.
Before he lost his tooth I was looking for ideas for a tooth fairy pillow on Pinterest I ran across a pillow with a picture of the teeth where you could write the date down. I thought genius! I am one of those moms that has kids with half finished baby books, I need all the help I can get in keeping track of their milestones. So here is my take on that idea.
Supplies
Steam-A-Seam
Computer Printer Fabric
2 Coordinating Fabric, Fat Quarters or 1/4 yards each
Initial – I used Ariel Black 400 Pt for this pillow
Teeth Pattern- teeth
Poly Filling
Scrap fabric for initial
Sewing Machine
Iron
Fabric Marker/Pen for later to write dates down
Step 1:
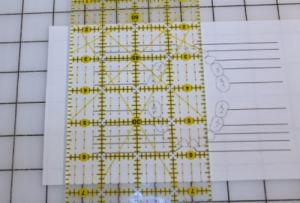
Print off your Teeth pattern on your computer printer fabric and then print your Initial on regular paper
Step 2:
Cut your fabric
2 – 7″ x 9″ of your main fabric for body of pillow – I used Riley Blake Chevron in Orange
2 – 6.5″ x 7.5″ of your coordinating fabric for pocket – I used Riley Blake Chevron in Navy
1 – 3″ x 14″ of your coordinating fabric for strap
Step 3:
Applique letter to front main fabric.
Trace letter on Steam-A-Seam with permanent marker. Remember that you will have to do a reverse image to make sure your letter is not backwards when you go to applique.
Remove one side of the paper and apply it to the wrong side of the fabric you are using for your initial. Then press the Steam-A-Seam down. Then cut out the letter.
Step 4:
Find the middle of one of your main body. I just folded the fabric in half and then half again and finger pressed.
After you find the middle arrange your initial in the center, remember until you press the letter with the iron you can move it. After you are happy with the placement press the letter down.
Step: 5
Off the the sewing machine. Pick the stitch that you would like to applique your letter down with I used a satin stitch, but you could use a zig-zag or strait stitch. Stitch around the letter.
Step 6:
Cut teeth fabric 3/4 inch away from the picture on each side. Then take off backing paper. Press edges under 1/2 inch on all sides.
Step 7:
Pin teeth to the right side of the pocket fabric 1 1/2 inches from the top. Stitch around the edge of teeth fabric.
Step 8:
Take both pocket pieces and put them wrong sides together. Stitch around 3 sides with 3/8 seam allowance leaving bottom open. Trim corners off and turn right side out and press.
Top Stitch 1/2 inch down from top.
Step 9
Fold up bottom 1/2 ” of pocket fabric. Using back of main fabric pin the pocket on. Sew sides and bottom to attach pocket.
Step 10:
Using the piece you cut for the strap. Fold it in half length wise, right sides together.Press together then sew a 3/8″ seam down the length.
Then turn the fabric right side out. Using a fabric turner makes this job easy if you have one.
Press fabric. You can press the fabric two ways here you can press along the seam or you can put the seam in the middle and press the strap down. Then top stitch down each side.
Step 11:
With your back main fabric pin the strap down so that if you put your strap seam in the middle it will be facing the back of pillow. I used my pocket as my guide for attaching my straps, as you can see in the picture above.
Step 12:
With right sides together pin both main fabrics together. Sew around the pillow leaving a 3 inch opening at the bottom. Then trim your corners.
Step 13:
Turn your pillow right side out and press.
Step 14:
Stuff your pillow and hand stitch the opening close.
Step 15:
Your finished, so sit back and admire your work. Then watch the little ones excitement when you give them their new Tooth Fairy Pillow.
–Mandy


