Summer Round Up

Wow, I can’t believe that it as been over 3 months since I last blogged. I need to get much better at being consistent as a blogger. With two active boys summer was packed full of activities from baseball, camping, the county fair, and ending the summer with their first year of soccer.

IMG_0837

IMG_0871

IMG_1155

Even with all the activities and working full-time I was able to get some sewing done this summer. I was so excited for the book Homemade Style by Anna Graham from Noodlehead to come out. This book has some amazing projects that are great for the beginning to advanced sewer.

.IMG_0672

I made the Gingham tote  from Handmade Style to enter in the Art Hall at the County Fair, which won 3rd place. I think I need a new game plan for next year if I am going to take home a 1st place ribbon, like picking the ugliest fabric I can find, those seemed to win first prize :). Even though I did not win, I love the this tote and am still using it every day. I can’t wait to make this bag again!

IMG_0818

With Halloween approaching, are  you making any Halloween costumes? My boys want to be an Indian and Cowboy. I will be sharing their costumes in an upcoming blog.

-Mandy

Got 99 Problems and the Sewings Not Going to Get Done

This year like most years I set myself up some pretty high expectations on all the gifts that I am going to make for my family and friends. I spends hours prusing through Pintrest trying to find the perfect gift to make …that’s my justifcation for all the time I get sucked in on Pintrest.  Of course this planning is all done in the summer and early fall, so I have plenty of time, I will just make a couple gifts a month and when Christmas gets here I will be done.

I just realized that tomorrow is Thanksgiving and well my plan to be organized and on top of Chirstmas gifts went out the window. So here I am looking at ads and trying to reevaluate my Christmas gift list, you will not catch me Black Friday shopping… that is not for me, I like to do all my shopping online.  However, I can’t not make just a few gifts, so you will find me late at night at my sewing machine after the kids are in bed probably questioning my sanity.  So with that being said here are the projects that I am going to take on before Santa arrives.

I was so excited when April Rhodes released her Popover Poncho  . What a perfect gift for some women in my life. I am a huge fan of April Rhodes patterns, they are great for everyone from the new sewer to the experianced. She has fantastic direction, that are much less intimidating than some of the name brand patterns.

Popover Poncho - April Rhodes

Popover Poncho – April Rhodes

For the boys teachers this year I am making the Snappy Manicure Wallet from Noodle-Head, this is a free pattern on her site. I only have to make 7 of them before school lets out for Christmas break. Piece of cake..right.

Snappy Manicure Wallet - Noodle-Head

Snappy Manicure Wallet – Noodle-Head

What are your plans for Chirstmas gifts, any projects you are working on?

Have a Happy Thanksgiving.  My family has had a blessed year and we have a lot to be thankful for.

Mandy


New Fabric Has Arrived At My Shop

Nothing makes me more giddy than knowing the big brown truck is going to pull in my drive and deliver a box of new fabric. It is like Christmas at my house for that hour or two, while I lovingly look at each fabric, thinking about all the wonderful things I want to make. Then my husband usually brings me down from cloud 9 and reminds me that the fabric is for my Etsy shop not for my personal enjoyment. Well….at least not all of it. I mean I have to try some of it right. What kind of sales person would I be if I did not test the product out first.

The first of the fabric is from Art Gallery and it is the Arizona Collection from the extremely talented April Rhodes. I absolutely love every print in this collection and had such a hard time deciding which ones to purchase for my shop. ARZ-553-Agave-Field-500px ARZ-554-Triangle-Tokens-500px ARZ-552-Clay-Sundot-500px ARZ-551-Tomahawk-Stripe-500px ARZ-550-Desert-Blanket-500px ARZ-557-Arid-Horizon-500px


When this arrived I knew I was going to have to make a Staple Dress also by April Rhodes out of one of these fabrics. I ended up going with Desert Blanket. I absolutely love how it turned out. this is the perfect dress to wear this fall with tights or leggings.  To purchase this pattern go to http://april-rhodes.com . Not only is April an amazing fabric designer, but her patterns are fantastic… anyone can make them from the new sewer to and experienced one. I also ended up making a hip purse to take to Disney World with me out of Agave Fields, look for a tutorial on this hip purse soon. It was just the right size for all the must haves while walking around the park.

staple dress with arizona arizona purse1


The second line of fabric is also from Art Gallery it is Gleeful from Sew Caroline. I love how bright and cheery this fabric is. Check out her blog she has some excellent tutorials http://sewcaroline.com/.

GFL-385-Cheerful-Echo-500px GFL-384-Springs-Sun-500px GFL-383-Lively-Buds-500px GFL-382-After-the-Rain-500px GFL-380-Preppy-Fleurs-500px

You can find all these fabrics in my shop Sew On The Edge www.etsy.com/shop/SewOnTheEdge.

-Mandy


Tooth Fairy Pillow Tutorial

tooth faily pillow first

It seems like it has been forever since I have posted on here, with summer in full swing we have been busy outside.  I posted about a month ago about how  my son was on the verge of losing his first tooth, so I made him this Tooth Fairy Pillow. I am happy to report that the Tooth Fairy did come to our house on May 30th and he now  has another loose tooth and is excited because he  can’t wait to see how much money the Tooth Fairy brings. I think he might be a little disappointed when he does not get as much for his second tooth as his first,  the Tooth Fairy would go broke giving him the first tooth premium.

Before he lost his tooth I was looking for ideas for a tooth fairy pillow on Pinterest I ran across a pillow with a picture of the teeth where you could write the date down. I thought genius! I am one of those moms that  has kids with half finished baby books, I need all the help I can get in keeping track of their milestones.  So here is my take on that idea.

supplies

Supplies

Steam-A-Seam
Computer Printer Fabric
2 Coordinating Fabric, Fat Quarters or 1/4 yards each
Initial – I used Ariel Black 400 Pt for this pillow
Teeth Pattern- teeth
Poly Filling
Scrap fabric for initial
Sewing Machine
Iron
Fabric Marker/Pen for later to write dates down

Step 1:

print outs

Print off your Teeth pattern on your computer printer fabric and then print your Initial on regular paper

Step 2:

cut pieces

Cut your fabric

2 – 7″ x 9″ of your main fabric for body of pillow – I used Riley Blake Chevron in Orange

2 – 6.5″ x 7.5″ of your coordinating fabric for pocket –  I used Riley Blake Chevron in Navy

1 – 3″ x 14″ of your coordinating fabric for strap

Step 3:

Applique letter to front main fabric.

t

Trace letter on Steam-A-Seam  with permanent marker.  Remember that you will have to do a reverse image to make sure your letter is not backwards when you go to applique.

tracing t

Remove one side of the paper and apply it to the wrong side of the fabric you are using for your initial. Then press the Steam-A-Seam down. Then cut out the letter.

Step 4:

 center of orange

 t on fabric

Find the middle of one of your main body. I just folded the fabric in half and then half again and finger pressed.

After you find the middle arrange your initial in the center, remember until you press the letter with the iron you can move it. After you are happy with the placement  press the letter down.

Step: 5

sewing on t

Off the the sewing machine. Pick the stitch that you would like to applique your letter down with  I used a satin stitch, but you could use a zig-zag or strait stitch. Stitch around the letter.

Step 6:

teeth picture

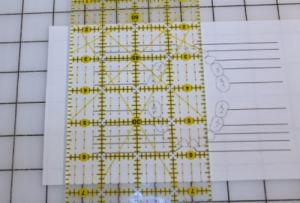
Cut teeth fabric 3/4 inch away from the picture on each side. Then take off backing paper. Press edges under 1/2 inch on all sides.

Step 7:

teeth on blue

Pin teeth to the right side of the pocket fabric 1 1/2 inches from the top. Stitch around the edge of teeth fabric.

Step 8:

sewing pocket

Take both pocket pieces and put them wrong sides together. Stitch around 3 sides with 3/8 seam allowance  leaving bottom open. Trim corners off and turn right side out and press.

Top Stitch 1/2 inch down from top.

Step 9

attaching pocket

Fold up bottom 1/2 ” of pocket fabric. Using back of main fabric pin the pocket on. Sew sides and bottom to attach pocket.

Step 10:

strap

Using the piece you cut for the strap. Fold it in half length wise, right sides together.Press together then sew a 3/8″ seam down the length.

Then turn the fabric right side out. Using a fabric turner makes this job easy if you have one.

Press fabric. You can press the fabric two ways here you can press along the seam or you can put the seam in the middle and press the strap down. Then top stitch down each side.

Step 11:

attaching handle

With your back main fabric pin the strap down so that if you put your strap seam in the middle it will be facing the back of pillow. I used my pocket as my guide for attaching my straps, as you can see in the picture above.

Step 12:

pinning it together 2

With right sides together pin both main fabrics together. Sew around the pillow leaving a 3 inch opening at the bottom. Then trim your corners.

Step 13:

.turnning pillow

Turn your pillow right side out and press.

Step 14:

stuffing

Stuff your pillow and hand stitch the opening close.

Step 15:

finished

Your finished, so sit back and admire your work. Then watch the little ones excitement when you give them their new Tooth Fairy Pillow.

Mandy

Preparing for the Tooth Fairy

My oldest just turned 6 last month and he is so excited because he finally has a loose tooth. I think that  he thought he was never going to lose one, most of his friends have lost teeth and I think he was feeling left out.

I have to be real honest I am glad that it has taken this long, because think  the whole process of loosing teeth is gross. I am not looking forward to that dangling dead tooth, they seem to want to wiggle every chance they get. Yuck!

So off to Pinterest I went looking for ideas for a Tooth Fairy Pillow.  I loved the idea of taking the picture of all the teeth they will lose and putting it on the pillow, so you can write the date next to the tooth. I am hoping this is a fail proof method for me to keep track of when the boys lose their teeth.   Because well…lets just say their baby books are not really up-to-date.  I mean if you count shoving the doctors report of their height and weight at their yearly check -up updating their baby book, then I am rocking it!

So here is what I came up with, the back pocket has the picture of the teeth with lines for writing the dates down. I used Riley Blake Chevron fabric in navy and orange.  And I love how it turned out.

tooth fairy pillow front pillow 2

I will post a tutorial on this tooth fairy pillow later on in the week with instructions on how to print the teeth on fabric!

Mandy

It’s Birthday Party Time At Our House

The past two weeks have been filled with Birthdays,  both of my boys had birthdays at the end of March and we had their birthday party last weekend. I am one of those crazy people that have kids with birthdays back to back. Our first son was born on March 31st and our second son was born on March 30th. This does make remembering their birthdays very easy. The boys had  their first friends party at a local bounce house place.  With the winter we have had, they need to let off some energy and this is the perfect place. Plus, it means that I don’t have to clean my house for guest..bonus for mom!

Of course with birthday parties comes cakes.  I do feel bad that they will always have to share a party, so I try to make that up by letting them each have their own cakes.  This year the oldest wants a Minion cake and the youngest wants a Teenage Mutant Ninja Turtle cake. I can remember my mom making our cakes and thinking how cool it was that she could create  unique cakes year after year.  So I have tried to keep up that tradition, I am just thankful that I have Pinterest for my inspiration/guidelines, mom usually just had to wing it.

The boys both had funfetti pancakes for breakfast

Fun Fetti Pancakes for Birthday breakfast

Funfetti Pancakes for the 4 year old Birthday breakfast

Fun Fetti pancakes for his 6th Birthday.

Funfetti pancakes for the 6th year old Birthday.

Boys and their cakes.

Boys and their cakes.

It was a great two weeks. I can’t believe that my babies are now 6 and 4. Time has flown.

-Mandy


Less Mess & Waste – How To Make Quick Un-Paper Towels

There are projects all over Pintrest on how to make cute reusable paper towels with flannel and terry cloth. Which I think are really cute, but they just take to much time to make in my opinion,  from sewing them together to putting on snaps or velcro . I don’t want to waste a lot of time on something that is going to be stained the first time I use it, or maybe your kids don’t spill stuff like mine do? Grape juice anyone.  So here is a quick tutorial on how to make un-paper towels with birdseye cotton using both a regular sewing machine and a serger. We have  been using these towels  for about a year now and we love them. The best thing is that they are white so you can bleach them when they get to gross looking.

Materials Needed:

-Birdseye Cotton – can be found at Joann’s or online with cloth diaper supplies

-Scissors/Rotary Cutter

-Sewing Machine/Serger

– Fray Check

materials needed

 Step 1: Wash your fabric. Birdseye will shrink so it is important to pre-wash and dry your fabric before you start. For 6 towels you need to plan on 1 1/4 yards of fabric if you are serging and 1 1/3 yards if you are using a regular sewing machine.

Cut fabric

Step 2: Cut your fabric, you can use whatever measurements you want, but for these I used a 12″x 18″ for serging if I was hemming them I would cut it 14″x18″ . If you are using a serger you can skip down to Step 5.

fold 12  fold again 12

Step 3: If you are using a sewing machine you will want to fold and press your edges down 1/2 inch and then turn them over another 1/2 inch and press to make sure the raw edges are folded under. Pin if you need.

finished hemmed

Step 4: Sew around the edges. Don’t forget to back stitch at the beginning and end. I used a 3/8 seam.

finished serged

Step 5: If you are serging, you can cut curves on the corners to make it easier to serge. Lock your stitch in place. I like to use fray check at this point to lock my stitches.

finished Finished Un Paper Towels

Step 6: You are finished. Now take them into your kitchen and start using them.

I know some people keep water proof bags in their kitchens to throw their dirty towels in,  my laundry room is right off my kitchen so they just get thrown into what ever load of laundry I am currently doing.

-Mandy

Ripping Seams & Sipping Wine

What do you get when you add wine to a sewing club? Lots of seam ripping and some unlady like words.

This past weekend some friends meet for what we like to call our Sew Winey Club, basically a couple hours away from the kids and husbands.  You never know what is going to happen during the project, things get cut wrong, sewed wrong, and the seam ripper seems like it never gets a rest. But we always have fun and laugh a lot at all our mistakes.

This months project was Easter Baskets using my tutorial from my past blog post.  sew winey

Check out how they turned out!

Finished Easter Baskets for our kids

Finished Easter Baskets for our kids

Here’s to happy sewing and seam ripping.

-Mandy

Goodbye 2013, Hello 2014

Where did the year go, 2013 was a year of taking a leap of faith and starting my Sew On The Edge Etsy Store http://www.etsy.com/shop/SewOnTheEdge. I wanted to start slow and build my business with the hopes of in the future opening a brick and mortar store in Troy, OH where I could offer quaility modern fabrics and classes from the beginning to advanced sewer. So I am so looking forward to what 2014 will bring to my small business.
With all the hustle and bustle of the Holidays I have not been able to post in a while, I have been busy getting in a new shipment of fabric from Westminster Fabrics. Check out these gorgeous fabrics that are now in my shop. Oh the things that you could make with these.

amy butler

French Wall Paper in Mustard, Corriander Seagreen, Corriander Pine and Gothic Rose in Burgandy from the Belle Collection by Amy Butler

diahla flower

Dahlia in Coral from the Bungalow Collection by Joel Dewberry

anna marie - dowry

Twilight and Twill Bouquet from the Dowry Collection from Anna Marie Horner

bailey

Dovex from Lottie Da Collection by Heather Bailey and the Bird of Paradise in aqua from the Little Azalea collection by Dena Fishbein.

Hope your New Year is a good one. We are currently being hit with a winter storm right now that is expected to drop around 12 inches of snow and reach temperatures below -20 with the wind chill.  Sounds like a good time to sew to me.

First Boxes Of Fabric Have Arrived!

This past week my first two boxes of fabric arrived. It was like Christmas at my house opening the boxes and looking at the gorgeous fabric inside. The first box to arrive was from Birch Fabrics which sells the softest organic cotton and knit fabrics. I could not wait to try a yard or two. The second box was from Moda and it was so colorful, made me think of spring on a day that it was less than 30 degrees outside. 

I have been busy taking pictures and posting the fabric on my new Etsy shop at https://www.etsy.com/shop/SewOnTheEdge. My third box of fabric is due to arrive on December 2nd and it is full of the new Belle line from Amy Butler and fabric from Anna Marie Horner’s Dowry line. This fabrics would be great for making Christmas gifts. 

Image

Box of chevron and poppie sun fabric from Birch.

Image

Box of sunshine! High Street fabrics from Moda.